There are at least 3 simple options for you to access the “Share Trip By Email” modal. NOTE: you will need to be Signed In and have an existing Trip before you can share any Trips.
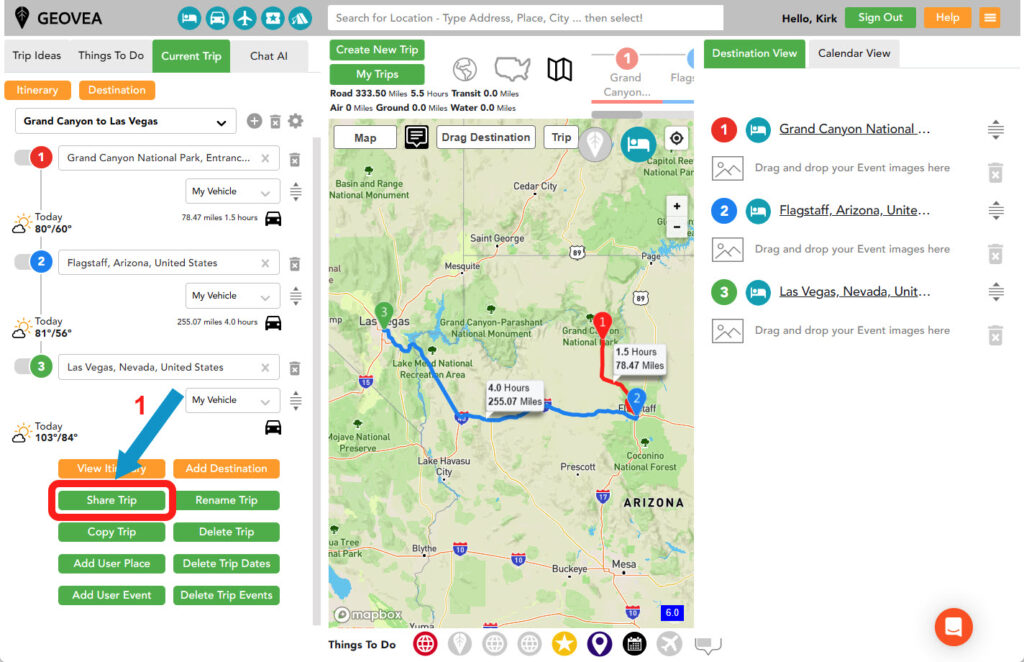
Option 1. First select the Trip you want to share. Then select the “Share Trip” button (1) from the Trip Planner page (below). This will take you to the “Share Trip By Email” modal.
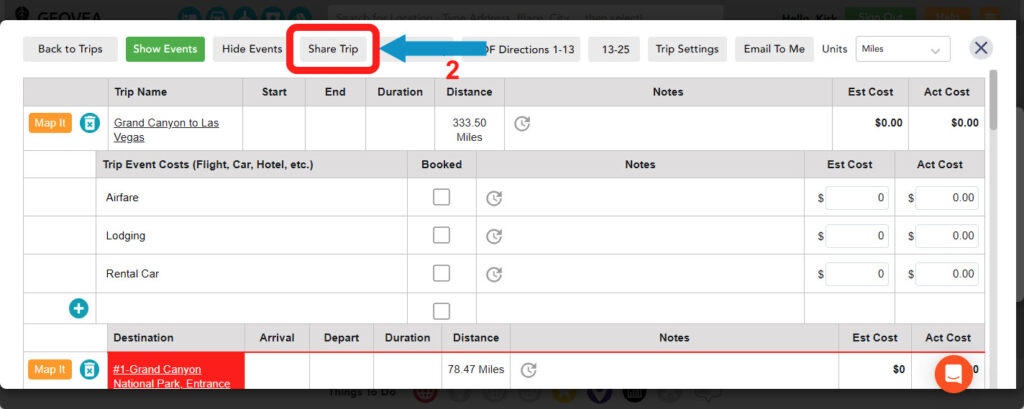
Option 2. From the Trip Planner page, make sure that you are viewing the Trip you want to share. Then depending on your current tab, select either the orange “View Itinerary” or the green “Itinerary” button. This will take you to the “Trip Itinerary” modal (below). From here, you select the “Share Trip” button (2). This will take you to the “Share Trip By Email” modal.
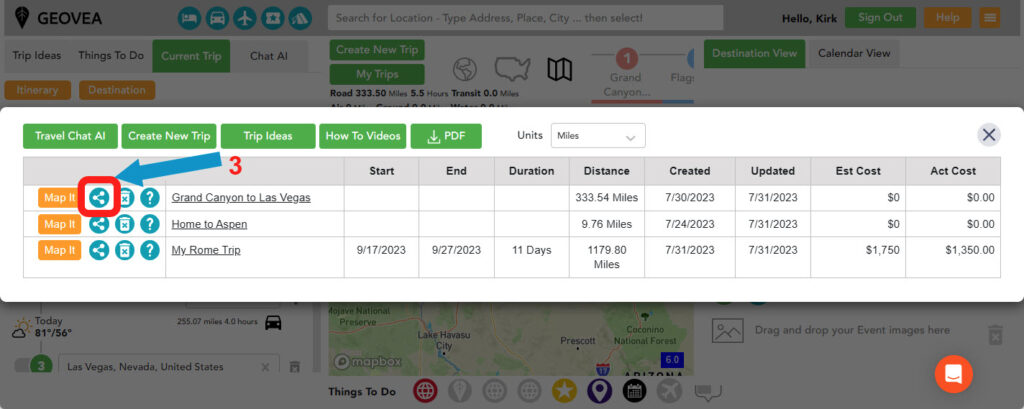
Option 3. From the “My Trips” modal, select the “Share Trip” icon (3) for the Trip you want to share. This will take you to the “Share Trip By Email” modal.
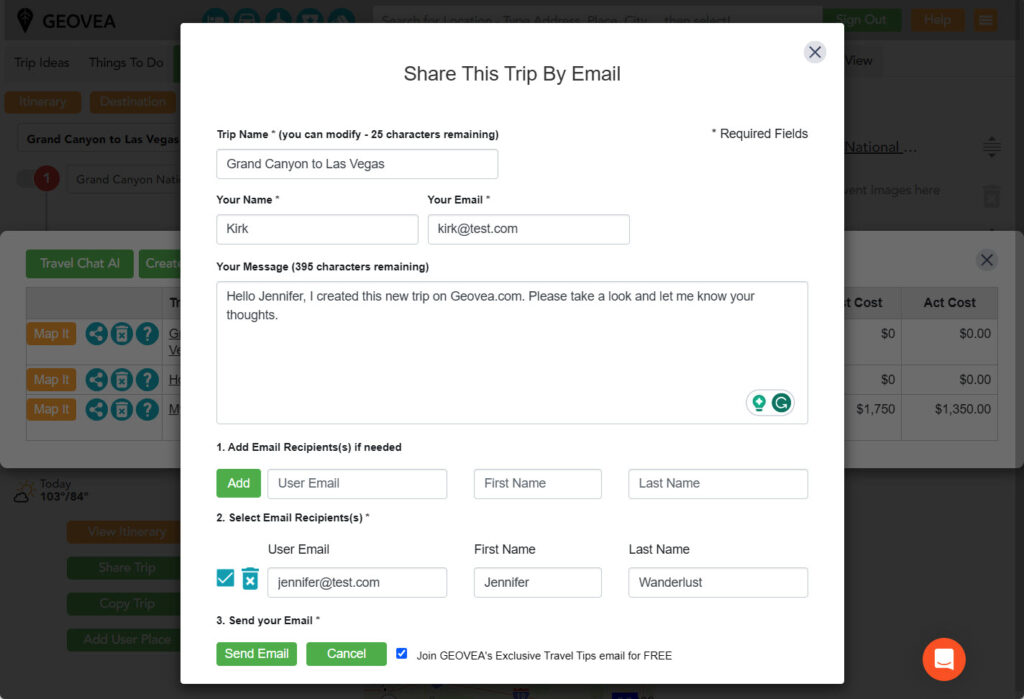
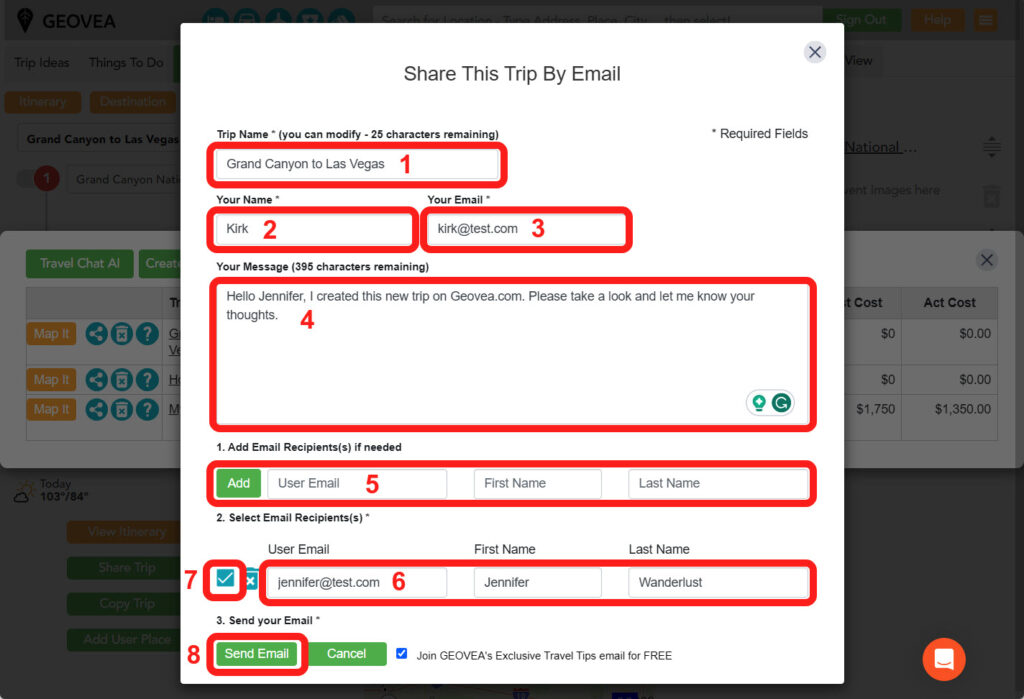
1. Fill out the “Share Trip By Email” modal.
Modify the Trip name if needed.
Modify your name if needed.
Modify your email address if needed.
Add a message if needed.
If you don’t have an existing email recipient (6), you will need to add a new one here.
Your list of available email recipients will be here. Once added, your recipients will be saved until you delete them.
Select as many email recipients you would like to share the Trip with.
If you have selected at least one email recipient, the “Send Email” button will turn green, allowing you to share the Trip.
The Saving of a Shared Trip by Email is easy!
2. Each email recipient that you selected will receive an email like below. The receipient first needs to select the orange “View this Trip Suggestion” button in the email (1). Clicking that will automatically take the user to the Trip Planner page by means of a special URL. NOTE: Any person wanting to save a shared Trip will need a Free Geovea Account and be Signed In.
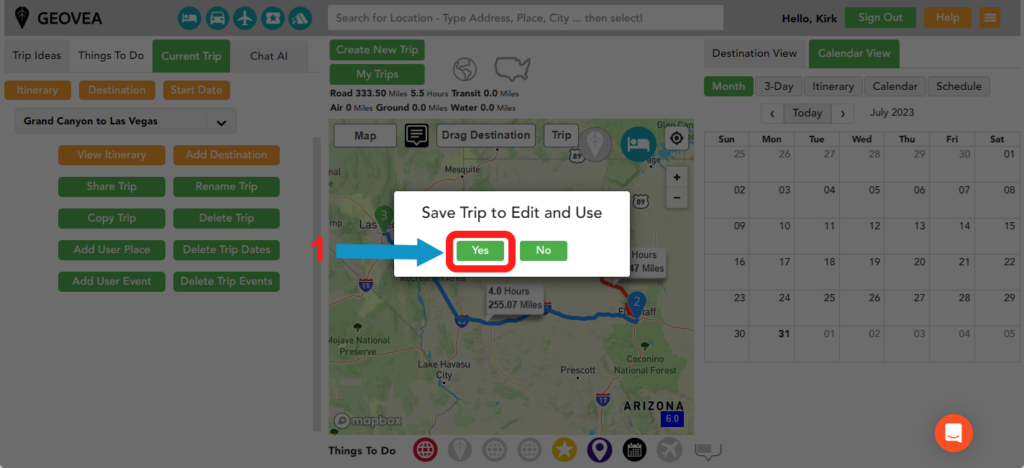
3. The email recipient will see the modal below and they just need to select the “Yes” button to save the Trip to their profile. The user can then simply view the Trip, or they can modify it and send it out to other friends and family members to review or modify.
NOTE: This functionality always works and if the email recipient does not receive the email, verify that the email address was correctly entered, or that the email is not in a spam folder.